
Home renovation projects are exciting, but they often bring dust, debris, and potential damage to valuable surfaces. Floors, windows, countertops, and fixtures are all at risk during construction activities. Without proper planning, even a short renovation can result in costly repairs.
To minimize avoidable costs and preserve your home’s condition, it’s important to follow a thorough surface protection checklist.
1. Assess All Vulnerable Surfaces
Before any work begins, identify every surface that could be exposed to damage. This includes hardwood floors, tiles, marble, carpets, glass windows, doors, cabinets, and countertops. Focus especially on high-traffic zones where workers and equipment move frequently.
By mapping out these zones in advance, you can apply targeted protection where it matters most.
2. Clean and Prepare Surfaces
Protection materials perform best on clean surfaces. Dust, dirt, or moisture trapped underneath can lead to scratches or reduce adhesion. Sweep or vacuum floors thoroughly, wipe down countertops, and ensure surfaces are completely dry before applying any protective coverings.
Proper preparation not only improves protection effectiveness but also prevents residue issues later.
3. Choose the Right Protection Materials
Not all protective materials are suitable for every surface. Selecting the correct solution is critical:
- Hardwood floors: Use breathable protection films or padded coverings to prevent scratches and moisture damage.
- Tile and stone floors: Opt for impact-resistant boards or heavy-duty films.
- Carpets: Use self-adhesive carpet protection films to keep fibers clean.
- Windows and glass: Apply transparent glass protective films to prevent paint splashes and scratches.
- Cabinets and countertops: Use low-tack films or foam sheets to avoid adhesive residue.
High-quality temporary protection films are designed to shield surfaces without leaving marks or affecting the original finish, making them a reliable choice for most renovation projects.
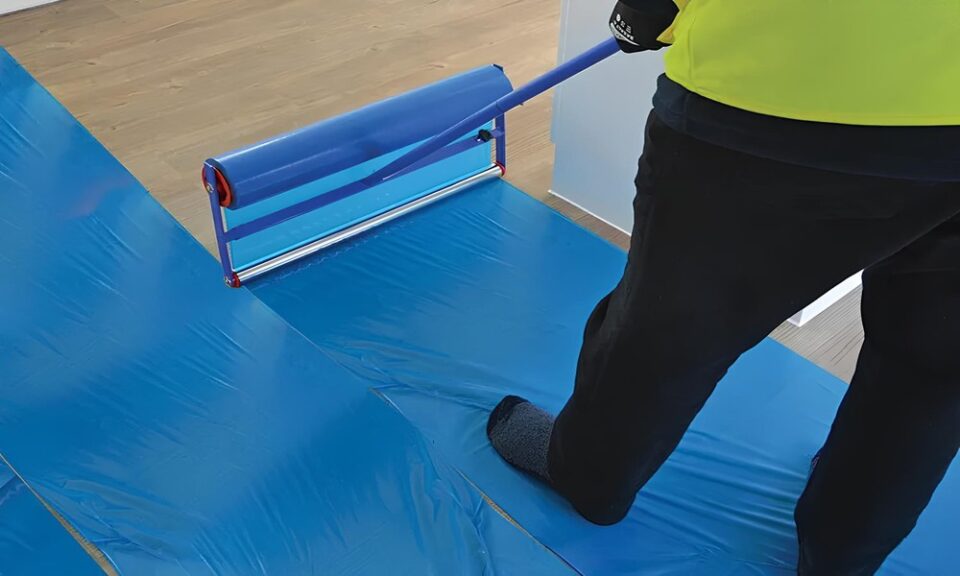
4. Ensure Proper Installation
Incorrect installation can reduce the effectiveness of protective materials. Make sure films are applied smoothly without bubbles or gaps. Overlap seams where necessary to provide full coverage. For floor protection, secure edges with tape to prevent tripping hazards and movement during work.
Correct installation guarantees consistent protection for the duration of the project.
5. Protect Against Dust and Debris
Dust is one of the biggest challenges during renovation. It can accumulate on surfaces, penetrate small gaps, and lead to lasting damage. Use temporary protective films, plastic sheeting, and temporary barriers to isolate work areas.
Sealing off doorways and vents helps prevent dust from spreading to other parts of the home.
6. Consider Impact and Heavy Traffic Protection
Renovation often involves moving tools, ladders, and heavy materials. Standard films may not be enough in high-impact areas. Reinforce floors with thicker boards or multi-layer protection systems in zones with heavy foot traffic or equipment movement.
This reduces the risk of dents, cracks, and surface wear.
7. Monitor and Maintain Protection
Surface protection is not a one-time task. Regularly inspect protective materials throughout the renovation process. Check for tears, loose edges, or worn-out areas, and replace them promptly. Continuous monitoring ensures that protection remains effective from start to finish.
8. Watch for Moisture and Temperature Changes
Moisture is particularly harmful to surfaces like hardwood and cabinetry. Avoid using non-breathable materials on sensitive surfaces unless they are specifically designed for moisture control.
Additionally, temperature fluctuations can affect adhesive performance, so choose products that can withstand varying site conditions.
9. Plan Safe Removal
Once the renovation is complete, remove protective materials carefully. Use products designed for clean removal to avoid leaving adhesive residue. If any residue remains, clean it with manufacturer-recommended solutions that are safe for the specific surface.
10. Final Inspection
After all protection materials are removed, conduct a thorough inspection of all surfaces. Look for any minor damage or residue and address it immediately. A detailed final inspection helps ensure your home is returned to its original-or even enhanced-state.